Saturday, September 20, 2014

Jackson JSON parser - Writing Custom Deserializer

One of major difference between Jackson and GSON is how they handle json parsing and mapping the json to a class object. While doing so Jackson uses strict checking which means the object from which the json was created and the class to which the json has to be mapped should be in strict sync.

Consider the following example -

class Foo {
    private String value;
}
class Bar {
    private String value;
}
and

String json = "{\"value\" : \"whatever\"}";
new Gson().fromJson(json, Foo.class);
new Gson().fromJson(json, Bar.class);
Gson is setup to perform a best effort to deserialize the given JSON into an instance of the given class. It will map as many fields as it finds. If none are found, that's too bad, mapping will not be done.

Coming to the custom deserializer thing. We may need to write one in few cases as - changing date format of the json string to our custom one. For writing our custom deserializer we need to write a class which extends JsonDeserializer<T>. In this class we implement  the method deserialize(...) which contains our custom conversion code.

public class CustomJsonDateDeserializer extends JsonDeserializer<Date> {
@Override
public Date deserialize(JsonParser jsonParser, DeserializationContext context)
        throws IOException, JsonProcessingException {
    SimpleDateFormat format = new SimpleDateFormat("yyyy-MM-dd HH:mm a z");
    String date = jsonParser.getText();
    try {
        return format.parse(date);
    } catch (ParseException e) {
        throw new RuntimeException(e);
    }
  }
}

Now annotate the field in the POJO which has to be deserialized using the custom deserializer.

@JsonDeserialize(using = CustomJsonDateDeserializer.class) private Date createdAt;

That's it. Pretty simple thing.

RestEasy 3.0


We were using RESTEasy 2.0 in on of our earlier projects. RESTEasy is a JBoss project that provides various frameworks to help you build RESTful Web Services and RESTful Java applications. The 2.0 version was quite simple to use. I decided to use version 3.0 in one of recent projects and the migration was not that tough. A lot of chages have been done in the newer version. I am going to mention the ones which I found out.

RESTEasy Client 

In version 2.0

        String url = "http://resetservice.com/api/testService";
        ClientRequest request = new ClientRequest(url);
        request.body("application/json", json);
        response = request.post();
        int status = response.getStatus();
        if (status == 200) {
            String data = (String) response.getEntity(String.class);
            Boolean value = new Gson().fromJson(data, Boolean.class);
            return value;
        }
        return false;


The same thing  in 3.0 now changes to -

     ResteasyClient client = new ResteasyClientBuilder().build();
     String result = getResponseString("http://resetservice.com/api/testService");
     Boolean returnVal = clientUtil.getObjectFromJson(Boolean.class, result);
     return returnVal; 


Authentication

I also had to use some in-house authentication technic.  I used it in very basic way. I checked for a particular request header (authorizationString) for authenticating the request. If that header is not present the request gets aborted. I used a very basic Below is the code snippet for the same.

@Provider
@ServerInterceptor
public class AuthorizationRequestFilter implements ContainerRequestFilter {

    @Override
    public void filter(ContainerRequestContext requestContext)
            throws IOException {
        final SecurityContext securityContext =requestContext.getSecurityContext();
        String header = requestContext.getHeaderString("authorizationString");
        try {
            if (securityContext == null || header == null || header == "" ||
                (header != null && !header.equals(
                ConfigReader.getInstance().getAuthToken()))) {
            requestContext.abortWith(
                    Response.status(Response.Status.UNAUTHORIZED).entity("User
                        cannot access the resource.").build());
        }
        } catch (ConfigurationException e) {
            e.printStackTrace();
        }
    }
}


Friday, September 19, 2014

Amazon RDS with MySql - How to create an instance!

This post will guide through how to use Amazon RDS, the steps of creating an instance and other related things.

Before going further one can take a look on few links to get a hang of what RDS is all about and how does it perform against other available solutions.


Lets get started.

1. Launch DB instance - AWS Services are relatively cheaper in USA region, so you can consider about choosing the region. Go to Amazon AWS console and select RDS from there. You will land up on the below page. Click "launch a DB Instance".


2. Select mysql engine.


3. Production- Choose Multi-AZ Deployment.


4. Specify DB Details - On the basis of your requirements you can choose DB Instance Class. In my case I used db.t2.medium which was of 5GB capacity. Specify user and password for the db from here.


5. Configure Advanced Settings - You can define your custom parameter group so you can simply choose default parameter group here. If you have a pre-defined security group, you should choose that one here. 


6. DB Instance Created- The database has now been created. It may take couple of minutes for the db to set up completely.


7. The newly created DB instance will start reflecting in the dashboard.


Changing the default configuration variables of MySql

Now after the db instance has been created we need to change a bit of configurations and monitor the db.

I struggled a bit when I had to change the default configuration values. To change the config values (equivalent to changing values in my.cnf file) we have these following steps.

1.  Go to RDS dashboard and select the database which you have created. Choose "Parameter Group" from the left pane.


2. Click on "Create DB Parameter Group" to create a custom Parameter Group. Choose some suitable name and description.


3. Now choose "Edit" to change the config. Some important variables as - max_connections, query_cache_size etc can be changed from here. The changes will be applied and reflected.


Monitoring


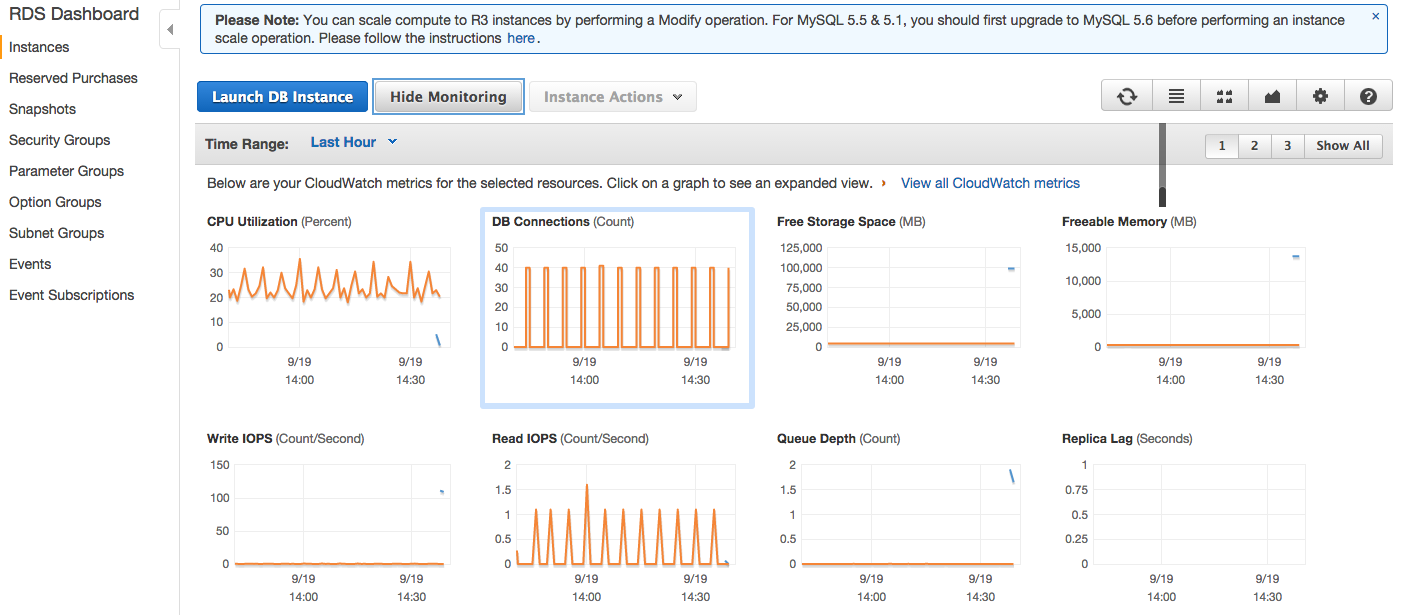
One of the coolest features of RDS is its monitoring. You can check out for n different metrics. - CPU Utilizations, Number of connections etc.


Simple, isn't it? Feel free to comment.